A door lock cylinder is the key component that determines how securely your door locks and unlocks. It houses the key mechanism, operates the latch and deadbolt, and directly affects both security and user experience. Over time, a cylinder may require replacement—whether due to lost keys, worn components, or upgrading to a higher-security model.
As a professional door lock cylinder manufacturer and OEM supplier, we provide precision-engineered brass, zinc alloy, and stainless steel cylinders for residential, commercial, and industrial applications. This guide explains in depth how to replace a door lock cylinder correctly, how to avoid common installation errors, and how to maintain it for long-term reliability.

Replacing a Door Cylinder is a simple yet effective way to enhance your property’s safety without replacing the entire lockset. You should consider replacement when:
Keys are lost or stolen, requiring new security control.
The cylinder becomes stiff or jammed, often caused by internal pin wear or corrosion.
You move into a new property and want a new set of keys.
You upgrade to high-security cylinders with anti-drill or anti-pick features.
The cylinder no longer fits correctly after hardware modification or door warping.
In most cases, a cylinder change restores full security and smooth operation with minimal cost.
Selecting the right cylinder ensures both compatibility and optimal protection. Below are the most common designs:
| Cylinder Type | Description | Typical Applications |
|---|---|---|
| Double Cylinder | Operated by key on both sides. | Main entrance, office doors. |
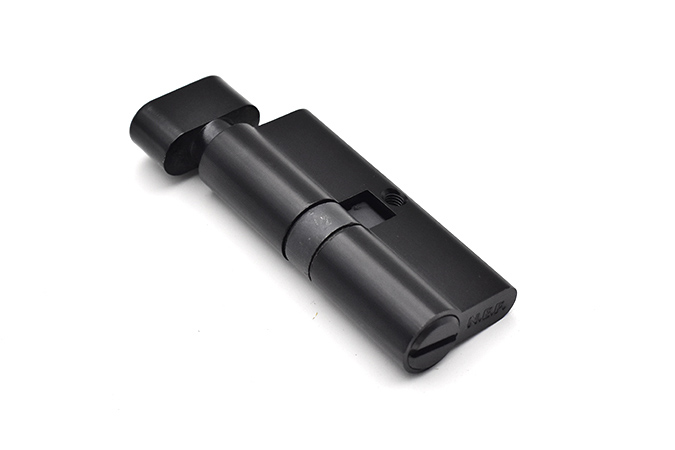
| Thumb-Turn Cylinder | Key on the exterior, knob on the interior for quick exit. | Apartments, hotel rooms. |
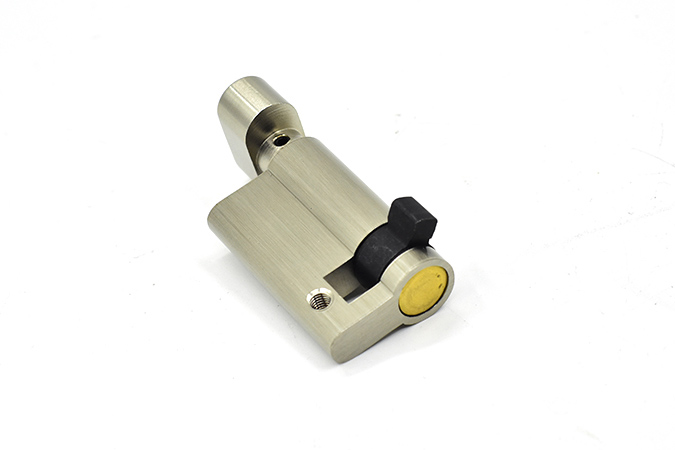
| Half Cylinder | Key access on one side only. | Garage, warehouse, or machine room doors. |
| High-Security Cylinder | Reinforced with anti-drill, anti-bump, or anti-pick features. | High-value or external doors. |
Our factory supports OEM/ODM customization for these models, offering various finishes such as satin nickel, matte black, antique brass, and PVD coatings for enhanced corrosion resistance and visual appeal.
Before replacing your door lock cylinder, always confirm the correct size and standard to avoid fitting issues.
Overall Length: The total length of the cylinder.
External and Internal Halves: Measure from the central fixing hole to each end (e.g., 30/30 mm, 35/45 mm).
Cam Type: The rotating part that connects with the lock body. Different brands use slightly varied cam shapes or rotation angles.
Projection Control: The cylinder should not extend more than 3 mm beyond the door escutcheon—this prevents forced attacks such as snapping.
Flathead or Phillips screwdriver
Measuring tape or caliper
Replacement cylinder
Key for the existing lock
Optional: graphite or silicone lubricant
Preparation ensures smooth and professional installation, reducing risk of damage to the lock or door.
Open the door to access its edge. Locate the long fixing screw near the latch or bolt. Remove it fully using a screwdriver.
Insert the key into the cylinder and gently turn it 10–15 degrees to align the cam with the lock body.
This alignment releases the cam from the latch mechanism so the cylinder can slide out.
While keeping the key slightly turned, pull the cylinder outward. If resistance occurs, wiggle the key gently or apply light lubricant—avoid forcing the cylinder.
Compare the old cylinder’s measurements with the replacement. Ensure both the cam position and keyway alignment are consistent.
Insert the new cylinder into the same slot. Rotate the key slightly to align the cam, then reinsert and tighten the fixing screw.
Do not overtighten—this can distort the lock body and affect smooth key movement.
With the door open, test locking and unlocking from both sides several times. The motion should feel firm but smooth, with no friction or grinding.
A professional installation is not only about fitting the cylinder—it’s about avoiding hidden mechanical errors that cause future problems. Below are the most frequent issues and how to prevent them.
If the cylinder protrudes too far outside the escutcheon, it becomes vulnerable to snapping or prying.
Solution: Measure carefully from the center fixing hole to both ends. Choose a cylinder that sits almost flush with the door surface.
Different lock mechanisms (Euro profile, mortise, or rim) use different cam profiles and rotation angles.
Solution: Match the replacement cam shape to your old one, or consult the manufacturer’s technical drawing.
Excessive tightening can bend the cylinder housing, resulting in rough or stiff key action.
Solution: Tighten until snug—then stop. Always test rotation before reattaching trims.
If the cam doesn’t engage correctly, the latch may fail to retract completely.
Solution: Insert the key and rotate gently during installation to align internal parts naturally.
Many users reassemble handles before testing, hiding potential misalignment.
Solution: Test the cylinder alone before installing handle hardware.
Avoiding these mistakes ensures your new lock operates with professional precision and lasting reliability.
If you are replacing your cylinder for security enhancement, consider these advanced mechanical features:
Anti-Drill Pins: Hardened steel inserts resist drilling attacks.
Anti-Bump Design: Prevents forced unlocking through bump keys.
Anti-Pick Mechanism: Complex pin structures block common picking tools.
Restricted Keyways: Custom key profiles prevent unauthorized duplication.
Reinforced Core: Built with stronger alloys to withstand external force.
These options significantly increase protection without requiring a new lock body, making them ideal for high-value properties and main entrances.
A door cylinder’s lifespan depends greatly on routine care and correct usage:
Lubricate regularly with graphite or silicone-based lubricants—avoid oily products.
Clean the keyway with compressed air to remove dust and debris.
Check screw tightness annually to prevent vibration loosening.
Replace bent or worn keys to avoid damaging internal pins.
Avoid slamming the door, which can cause mechanical stress on the latch and cylinder.
Use corrosion-resistant finishes such as nickel or stainless steel for outdoor installations.
With proper maintenance, a high-quality cylinder can maintain flawless function for over 10 years.
Replacing a door lock cylinder is a small task that has a major impact on security. By following professional procedures—measuring accurately, aligning the cam, and testing thoroughly—you can ensure your door locks with reliability and strength.

Previous: How To Install A Mortise Lock?