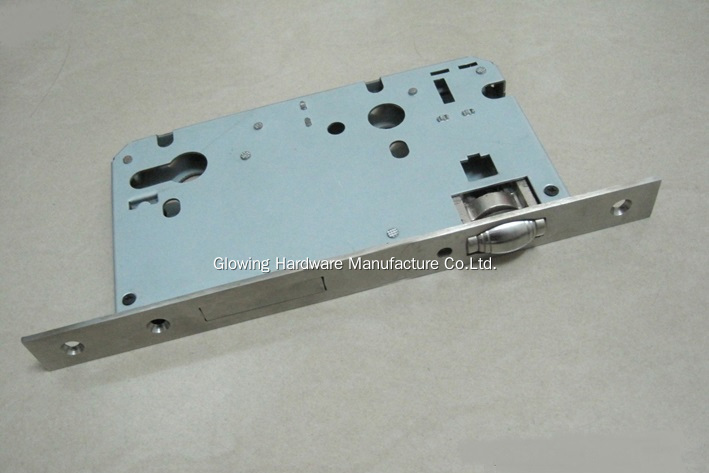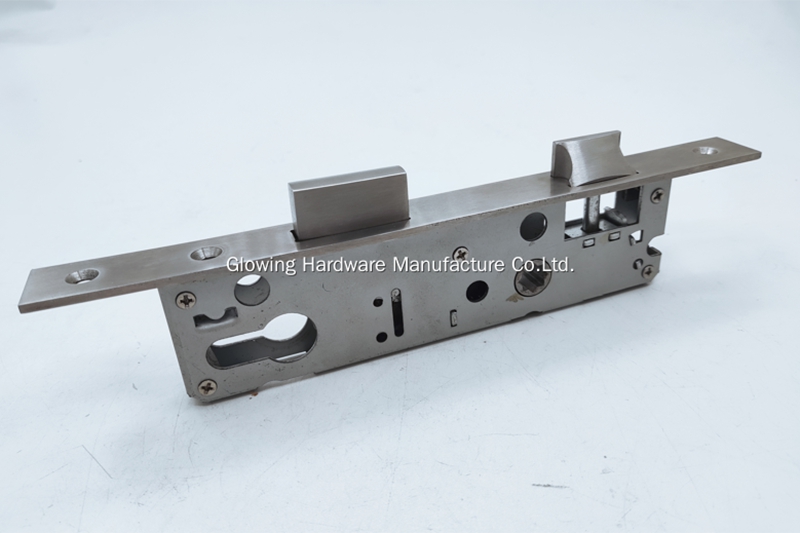
A Mortise Lock is one of the most secure and durable locking systems commonly used in residential, commercial, and industrial buildings. Unlike surface-mounted locks, a mortise lock is fitted into a precisely cut pocket within the door edge, offering both security and refined aesthetics. This guide provides a detailed step-by-step explanation of how to install a mortise lock, along with instructions on how to avoid installation mistakes, ensuring long-term reliability and performance.

A mortise lock is made up of several coordinated components that must align precisely for smooth operation:
Lock Body: The central mechanism that fits into the mortise pocket. It houses the latch and deadbolt.
Faceplate: The visible metal plate on the door edge that keeps the latch and bolt aligned.
Latch Bolt: Automatically engages when the door closes.
Deadbolt: Provides additional locking security when the key is turned.
Strike Plate: Installed on the door frame to receive the latch and bolt.
Spindle Hole: Connects the handle or lever to the lock mechanism.
Each part must be installed accurately—improper alignment or positioning may cause friction, jamming, or early wear.
Measuring tape
Electric drill with appropriate bits
Sharp chisel and hammer
Screwdriver set
Marking pencil or gauge
Masking tape
Check door thickness (typically between 35–60 mm).
Confirm backset size (the distance between door edge and handle center—commonly 45 mm or 60 mm).
Mark handle height—generally around 1 meter from the floor.
Prepare a clean workspace and ensure all parts are within reach.
Proper preparation saves time and prevents measurement errors.
Close the door and mark the centerline of the handle height. Outline the position and dimensions of the lock body on the door edge using a pencil and ruler.
Drill a row of overlapping holes along the marked outline using an appropriate drill bit size. Use a chisel to remove excess wood or metal, forming a smooth rectangular cavity.
Tip: For wooden doors, tape the drilling area to minimize splintering. For metal doors, use cutting oil to reduce heat.
Insert the lock body into the cavity and ensure it sits flush with the door edge. Adjust the depth and shape as necessary until the lock slides in smoothly.
With the lock body in place, mark the positions for the spindle hole (for the handle) and keyhole on both sides of the door. Remove the lock body, then drill these openings cleanly through the door surface.
Insert the lock back into the pocket, ensuring the latch bolt faces the correct direction (it should retract toward the hinges). Fasten the faceplate firmly using the provided screws.
Check that both the latch and deadbolt extend and retract freely when operated by the handle and key.
Close the door gently and mark where the latch and deadbolt meet the frame. Chisel out recesses in the frame for the strike plate, ensuring perfect alignment with the latch position.
Fix the plate securely with screws. It should sit flush and allow smooth engagement of the latch and bolt.
Insert the key and turn the handle several times. Ensure:
The latch moves effortlessly.
The deadbolt locks and unlocks without resistance.
The door closes securely with no gaps or rattling.
If misalignment occurs, adjust the strike plate position slightly.
Even experienced technicians can make mistakes if key details are overlooked. Below are the most common errors and professional prevention methods to help you achieve flawless installation.
Problem:
Choosing a backset that doesn’t match the door design or handle position can lead to awkward ergonomics and misalignment between the lock and handle.
Prevention:
Measure the door and desired handle placement accurately before purchasing.
Confirm that your lock’s backset (e.g., 45 mm or 60 mm) corresponds to your door’s thickness.
For large commercial doors, opt for extended backsets for better handle positioning.
Problem:
If the latch or deadbolt doesn’t align with the strike plate, the door may not close or lock properly.
Prevention:
Perform a “dry fit” before drilling into the frame.
Mark latch and deadbolt contact points with precision before chiseling.
During final fitting, ensure the latch clicks easily into place without extra force.
If minor misalignment occurs, adjust the strike plate by 1–2 mm rather than forcing the latch.
Problem:
A cavity that is too shallow prevents the lock from sitting flush; one that’s too deep can reduce structural support.
Prevention:
Mark drilling depth clearly using masking tape on your drill bit.
Use a depth gauge or depth stop if available.
Avoid over-chiseling—small gaps can weaken the door edge over time.
Ensure that both the top and bottom of the cavity are flat for even support.
Problem:
Overtightening the faceplate or strike plate screws can distort metal parts, causing the latch to stick or rub against the plate.
Prevention:
Tighten screws firmly but gently—stop once resistance is felt.
Check latch movement after tightening each screw.
Use hand tools instead of power drivers for final adjustments.
Problem:
Applying the same drilling technique to wood, steel, and composite doors may cause cracking, overheating, or uneven edges.
Prevention:
Use wood bits for timber doors and high-speed steel bits for metal doors.
For steel or aluminum doors, apply cutting oil to reduce friction.
Drill slowly to maintain clean edges, especially on laminated or veneered doors.
Problem:
Installing decorative trims or handles before testing may hide underlying mechanical issues.
Prevention:
Always test the latch, bolt, and handle function before installing trims.
Verify that the deadbolt fully extends and retracts with a single key turn.
Correct any resistance or noise before finalizing installation.
Problem:
Small measurement errors compound during drilling, leading to visible gaps or off-centered handles.
Prevention:
Use a sharp pencil or marking gauge for thin, accurate lines.
Double-check all measurements—“measure twice, drill once.”
Use templates provided by the manufacturer for consistent results.
Problem:
Rushing installation can lead to sharp edges, unfinished surfaces, or dust entering the lock body.
Prevention:
Smooth all chiseled edges to prevent splinters or uneven seating.
Use compressed air or a small brush to remove dust from the cavity.
Apply a small drop of lubricant to ensure smooth operation.
By carefully managing these potential errors, you ensure that your mortise lock functions smoothly, looks professional, and lasts for many years.
Lubricate moving parts once a year using a non-corrosive silicone lubricant.
Tighten screws periodically to prevent loosening from door movement.
Avoid slamming the door, as impact weakens the latch mechanism.
Clean regularly with a dry, soft cloth—avoid harsh chemical cleaners.
Inspect alignment every 6–12 months, especially for frequently used doors.
Installing a mortise lock requires careful planning, precise measurements, and methodical work. The key to success lies in avoiding common errors—such as misalignment, over-drilling, or incorrect backset selection—and ensuring every component fits perfectly.
As an experienced mortise lock manufacturer, we not only provide customizable, high-quality locking systems but also offer professional guidance to ensure your project runs smoothly from installation to long-term use. If you have any questions, please contact us.
